mattpocock/skills Series (1): Set Up Your Project Rules First, Then Let ask-matt Find the Next Step
You don't need to memorize 25 skills to start using mattpocock/skills. This post covers how to install them, what setup-matt-pocock-skills leaves behind in your project, and how to use ask-matt to find your next step.

You’re about to add per-seat billing to an existing subscription service, but you’re not sure whether to start by clarifying requirements, writing a spec, adding tests, or just diving into the code. You’ve heard that mattpocock/skills can help an AI coding assistant handle this kind of work more methodically, but when you open the list, you’re greeted by 25 skill names. Do you really have to understand every one of them before you can begin?
First, a few terms. An AI coding assistant is an AI tool such as Claude Code or Codex that can read and write the files in your project and write code for you. A skill can be thought of as a set of instructions that tells the AI coding assistant how to do a specific job, such as how to interview you about requirements, or how to break a spec down into individual tasks. mattpocock/skills is a complete set of skills published by Matt Pocock.
The answer is no, you don’t need to understand them all. Your first time through takes just two steps: use setup-matt-pocock-skills to record your project’s working rules, then let ask-matt suggest the next skill based on the problem in front of you.
That said, ask-matt is more like a help desk than a manager that automatically runs the whole pipeline. It only tells you which skill to use next; you still have to start that skill yourself.
mattpocock/skills Series Part 1 This post is based on version
1.2.3. The official plugin’splugin.jsonincludes 25 skills. The repository also contains 9 items that are still experimental and 4 that aren’t currently being promoted, listed inin-progress/README.mdandmisc/README.mdrespectively. This series only covers the 25 included in the official plugin.
Installing vs. Invoking: Two Separate Questions
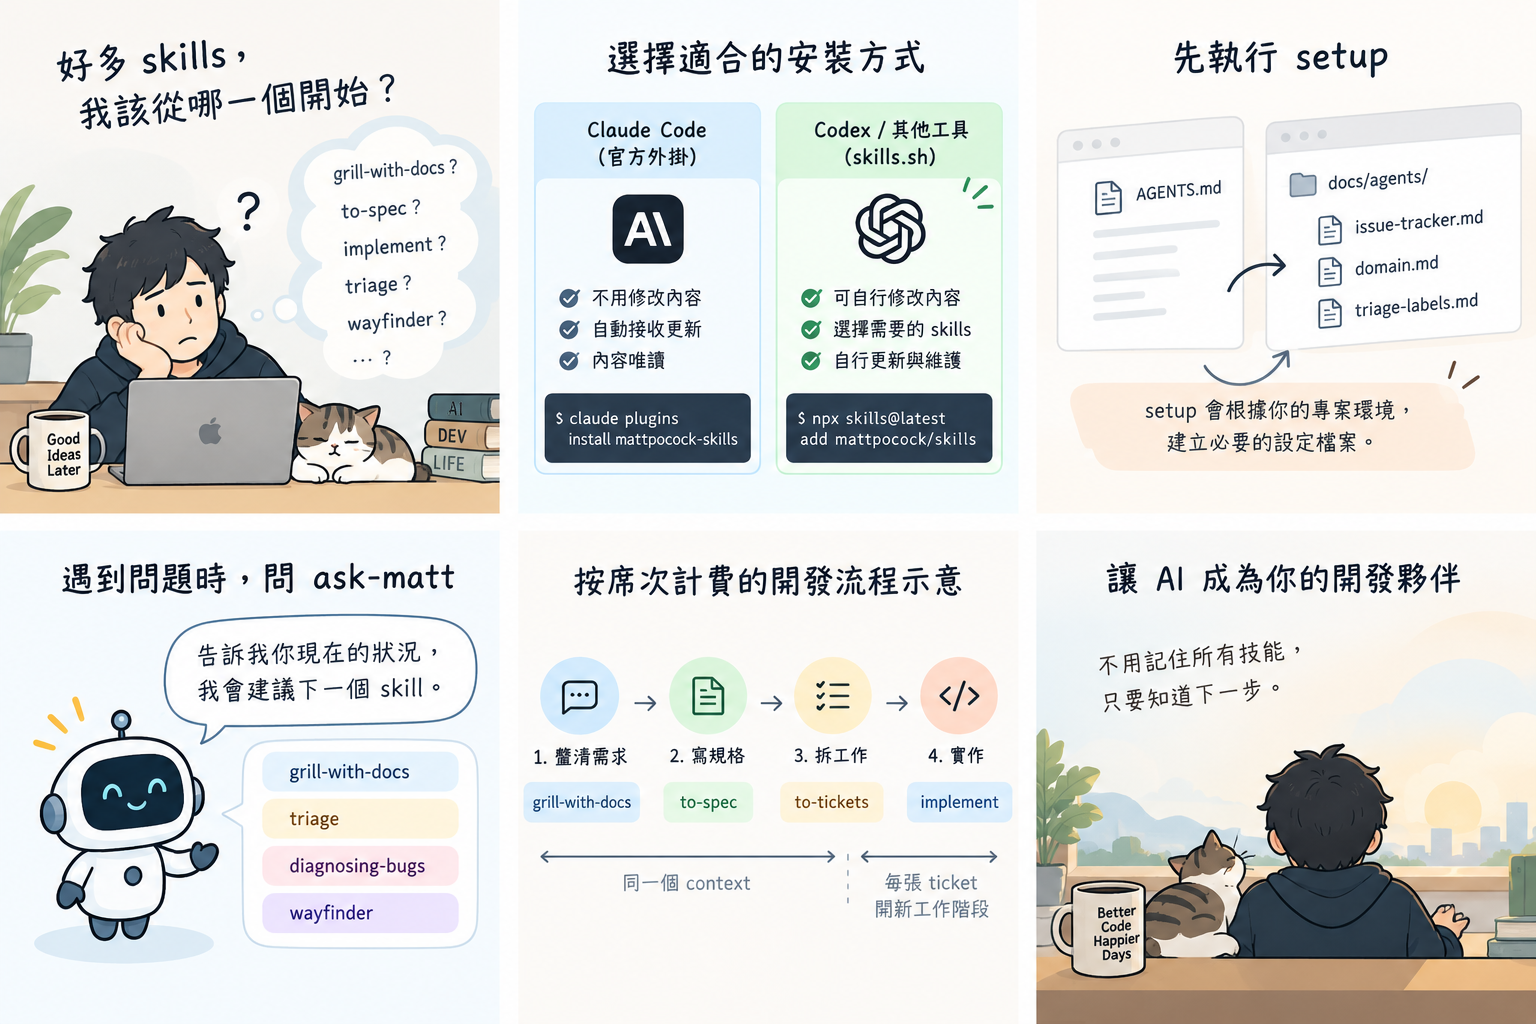 The full path for first-time use: choose an installation method, run setup, then let ask-matt suggest the next skill.
Installing and invoking are two different questions. The installation method determines where the skill files live and who is responsible for updating them; the invocation method determines who can tell a skill to start working.
Pick One Installation Method
mattpocock/skills treats .agents/install-block.md as the single source of truth for installation instructions. Choose based on the tool you use:
| Your situation | Installation method | Maintenance afterward |
|---|---|---|
| Using Claude Code, no plans to modify the skills | Official plugin | Updates automatically; contents can’t be modified |
| Using Claude Code, want to modify the skills | skills.sh | Files are copied into your project; you modify and update them |
| Using Codex or another tool that supports skills | skills.sh | Files are copied into your project; you modify and update them |
Claude Code is Anthropic’s AI coding assistant, while Codex comes from OpenAI. The command to install the official plugin for Claude Code is:
1
claude plugins install mattpocock-skills
You can also type /plugin install mattpocock-skills directly inside Claude Code.
For Codex or other tools, use the skills.sh installer:
1
npx skills@latest add mattpocock/skills
skills.sh lets you check off which skills to install and which AI coding assistants to install them for. Be sure to include setup-matt-pocock-skills; if you want to follow along with ask-matt in this post, include that too. Any other skill that ask-matt recommends later also has to be installed before you can use it.
Pick only one of the two methods. Using both will make every skill show up twice. With skills.sh, the command to update a single skill is:
1
npx skills@latest update <name>
Understand Who Can Invoke a Skill
mattpocock/skills sorts skills into two categories based on who can invoke them:
| Term | Who can invoke it |
|---|---|
| user-invoked | Only a human, by typing its name |
| model-invoked | A human can invoke it, and the AI can also pick it up on its own when the task calls for it |
A user-invoked skill can in turn call a model-invoked skill, but it cannot call another user-invoked skill. The full set of constraints is documented in the invocation rules.
Both setup-matt-pocock-skills and ask-matt are user-invoked, so you have to type their names yourself. Claude Code and Codex use different syntax:
| Tool | Example input |
|---|---|
| Claude Code | /setup-matt-pocock-skills |
| Codex | $setup-matt-pocock-skills |
In Codex, you can type $ and then pick a skill from the list, or type $skill-name directly. You can verify this syntax in OpenAI’s Codex skills documentation. For other AI coding assistants, use their own skill menu or input syntax.
This constraint also explains why ask-matt can only make suggestions: the grill-with-docs skill it recommends is also user-invoked, so you have to type it yourself. It also won’t automatically go on to run to-spec, to-tickets, and implement.
What Setup Leaves Behind in Your Project
The skills in mattpocock/skills that focus on software development (grouped under “engineering” in the repo) need to know some basic information about your project. So before using them for the first time in any project, you need to run setup-matt-pocock-skills once. It isn’t an installer that does the same thing every time; it inspects first, asks questions next, and writes files only at the end.
It starts by looking at the current state of the project: which platform hosts the code (GitHub, for example), whether the project already has AI instruction files (AGENTS.md or CLAUDE.md), a glossary, decision records, or configuration files left over from a previous run, and whether the project is made up of multiple subprojects (a monorepo). The glossary (CONTEXT.md) records definitions of project-specific terms, and decision records (ADRs) capture the reasoning behind important technical choices. The next post covers both in detail.
Once it’s done looking, it confirms three things with you, in order:
- Where work gets tracked. The repo calls this the issue tracker: the place where your team records to-do items. If your code is on GitHub, it suggests GitHub Issues by default; if it’s on GitLab, it suggests GitLab. You can also track work in Markdown files inside the project folder. If you use another tool such as Jira or Linear, you describe how to work with it in a short paragraph.
- Whether to keep the default triage labels. These labels are used by
triage, which sorts incoming external reports, so it only asks about them iftriageis installed. - Where the glossary and decision records live. For a typical project, a single shared copy is enough. Only when it detects that the project is made up of multiple subprojects does it ask whether each subproject should have its own.
After you confirm, it modifies or creates the following files:
| Location | What gets written | Condition |
|---|---|---|
CLAUDE.md or AGENTS.md | An ## Agent skills section pointing to the configuration files below | Edits CLAUDE.md if it exists, otherwise AGENTS.md |
docs/agents/issue-tracker.md | Where the issue tracker is and how to use it | Always created or updated |
docs/agents/domain.md | How the glossary and decision records are organized | Always created or updated |
docs/agents/triage-labels.md | The names of the triage labels | Created or updated only if triage is installed |
If the project has neither instruction file, it asks which one you want to create rather than deciding on its own. If a file already contains an ## Agent skills section, it updates that section in place instead of adding a duplicate.
Setup only writes the label names into docs/agents/triage-labels.md; the process as written has no step that creates those labels on GitHub or GitLab. Before you start triaging, it’s a good idea to make sure the label names in your issue tracker match the configuration file.
Before writing anything, it must show you drafts of the ## Agent skills section and each configuration file so you can edit and approve them. Once written, these files are just ordinary project documents that you can edit directly from then on. You only need to run setup again if you want to switch issue trackers or start over from scratch.
How ask-matt Picks the Next Step
ask-matt doesn’t expect you to memorize every skill first. Just describe your current situation, and it suggests which skill to start with. Common starting points:
| Current situation | Suggested starting point |
|---|---|
| In a project, want to talk through a half-formed idea | grill-with-docs |
| No project folder, just want to talk an idea through | grill-me |
| Need to sort through bug reports and requests submitted by others | triage |
| Hitting a bug that’s hard to reproduce, intermittent, or recently introduced | diagnosing-bugs |
| The scope is fuzzy and won’t fit in a single conversation | wayfinder |
The main path for typical feature development starts with grill-with-docs, which clarifies requirements through an interview. If a question can only be answered by building something you can actually try out, such as what a screen should look like, the flow takes a temporary detour: use handoff to write up your current progress as a handoff document, build a throwaway prototype with prototype in a new conversation, and once you have your answer, use handoff again to bring the result back into the original discussion.
If you’re sure the work will take several conversations to complete, use to-spec next to put together a spec and to-tickets to split the spec into individual tickets. Finally, open a fresh conversation for each ticket and implement it with implement. Internally, implement uses tdd (a development approach where you write the tests first, then the code) to build the feature, and runs code-review before committing the changes.
Everything from the requirements interview through to-tickets should stay in the same conversation, so that later steps build on the earlier discussion. Only after the tickets are created does each one get its own new conversation; each ticket already spells out the information it needs, so it doesn’t depend on earlier conversation history. The full rules are in ask-matt/SKILL.md.
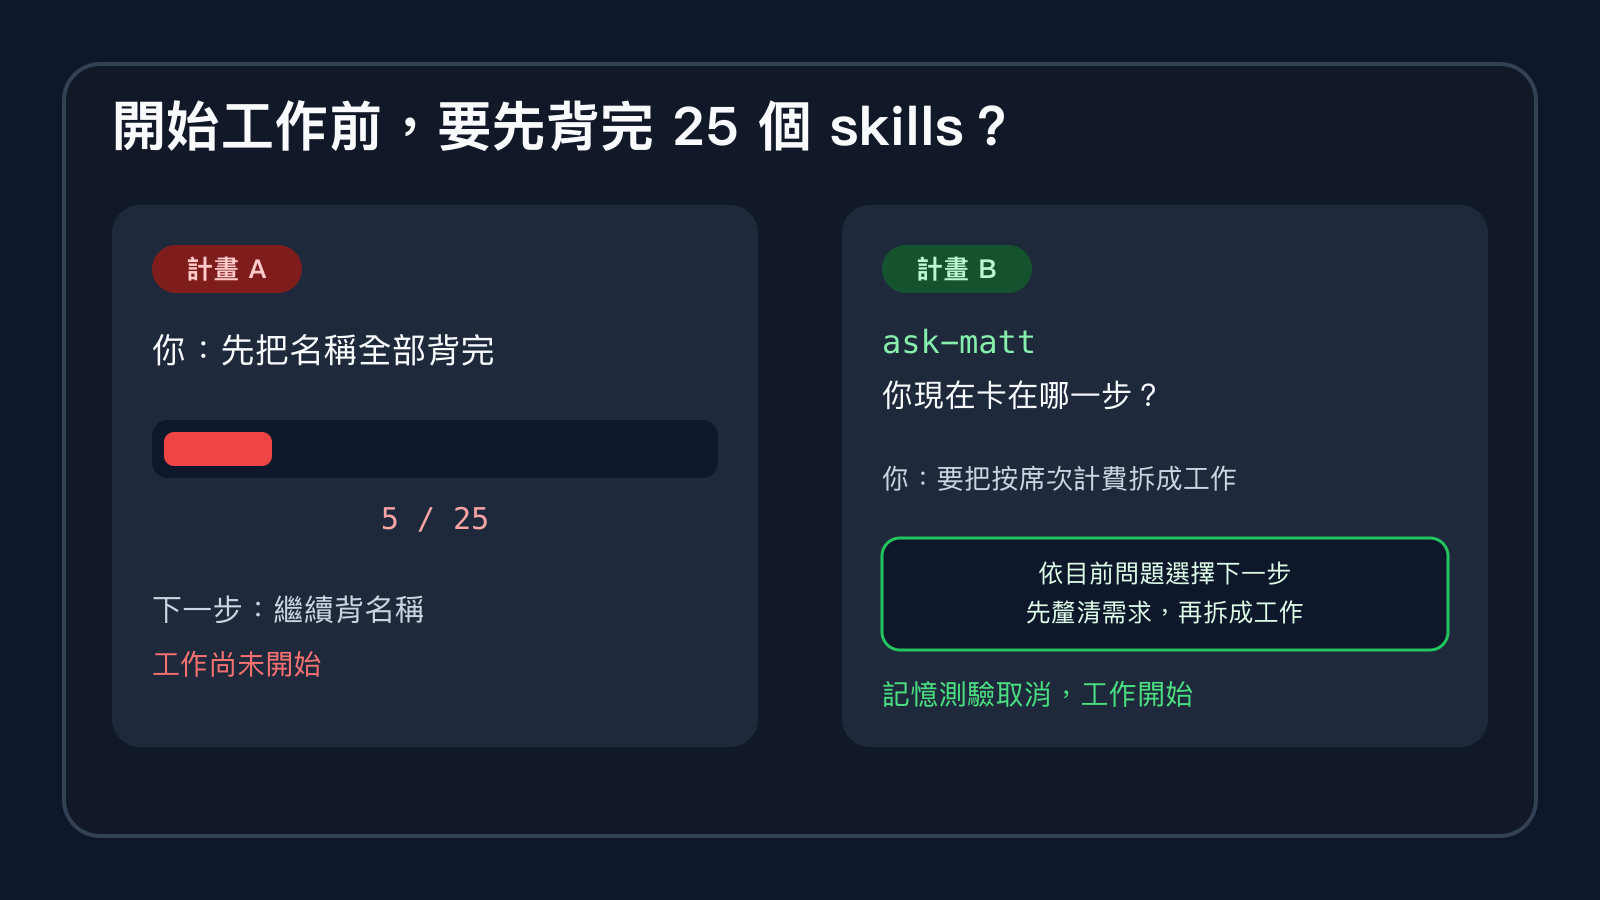 Memory test canceled. Time to get to work.
Walkthrough: Adding Per-Seat Billing to an Existing Service
This section walks through the scenario based on the rules as written in version 1.2.3; it is not a record of an actual run. Assume the project is made up of several subprojects, the code is hosted on GitHub, and work is tracked in GitHub Issues.
Using Codex as the example, first install the skills you need with skills.sh. Here we’ll assume every skill mentioned below has been selected. Then type:
1
$setup-matt-pocock-skills
Setup notices the code is on GitHub and suggests sticking with GitHub Issues. It also sees from the folder structure that the project consists of multiple subprojects, so it asks whether the glossary should be one shared copy or one per subproject.
If triage is installed as well, setup also asks whether to keep the five default labels:
1
2
3
4
5
needs-triage
needs-info
ready-for-agent
ready-for-human
wontfix
In order, these five labels mean “awaiting evaluation,” “waiting for more information,” “ready to hand off to the AI,” “needs a human,” and “decided not to fix.” If your team’s issue tracker already uses different label names, you can map them to those names instead to avoid ending up with duplicate labels.
Once you confirm these choices, the AI coding assistant first shows you what it’s going to write. Only after you approve does it modify CLAUDE.md or AGENTS.md and create the configuration files under docs/agents/.
With setup done, describe the work you’re stuck on:
1
$ask-matt We need to add per-seat billing to an existing subscription system. Right now there's only a short requirements description. The requirements should be clear after one conversation, but the implementation will happen over several sessions.
Following its rules, ask-matt will suggest starting with grill-with-docs to work through questions like how pricing is calculated, when a seat starts and stops being used, the billing cycle, and how existing customers are migrated. The flow doesn’t continue automatically; you have to type the next skill yourself:
1
$grill-with-docs
Once the requirements are clear, stay in the same conversation and type the following in order:
1
2
$to-spec
$to-tickets
to-tickets splits the spec into smaller tickets and marks which ones must be done first and which have to wait until earlier ones are finished.
After the tickets are created, open a new conversation for each ticket and type:
1
$implement <ticket URL or number>
This workflow only handles the order of the work. It won’t decide your pricing rules, how seats are counted, or how old data is migrated for your team. Those product and technical decisions still have to be made by the team during requirements clarification.
How to Choose on Your First Run
If you plan to adopt this workflow, pick one installation method first, then run setup once for your project. After that, whenever you’re unsure how to approach a piece of work, ask ask-matt.
If you already know which skill comes next, you can skip ask-matt and invoke it directly. However, skills that need to read your issue tracker or glossary configuration still require setup to be completed first. For one-off work that isn’t inside a project folder, there’s no need to build out the whole project configuration just to use a single skill.
This post examines the design and usage of version 1.2.3; it doesn’t claim this workflow will necessarily shorten development time. Its direct benefits are that it turns your project conventions into written documentation and suggests a suitable skill when you’re unsure what to do next. The next post covers how to clarify requirements and build a vocabulary your team shares.
Further Reading
README.md: verify the official installation methods and first-time setup instructions.- Invocation rules: learn which skills can only be invoked by a human.
setup-matt-pocock-skills: see which files it reads and writes.ask-matt: see which next step fits each situation.- OpenAI Codex skills: verify how Codex selects and invokes skills.