Let Two AI Agents Work Separately: Isolated Working Directories With git worktree
How to give two AI agents their own git worktree, how to list and remove them, and why this does not suit a repo that uses submodules.
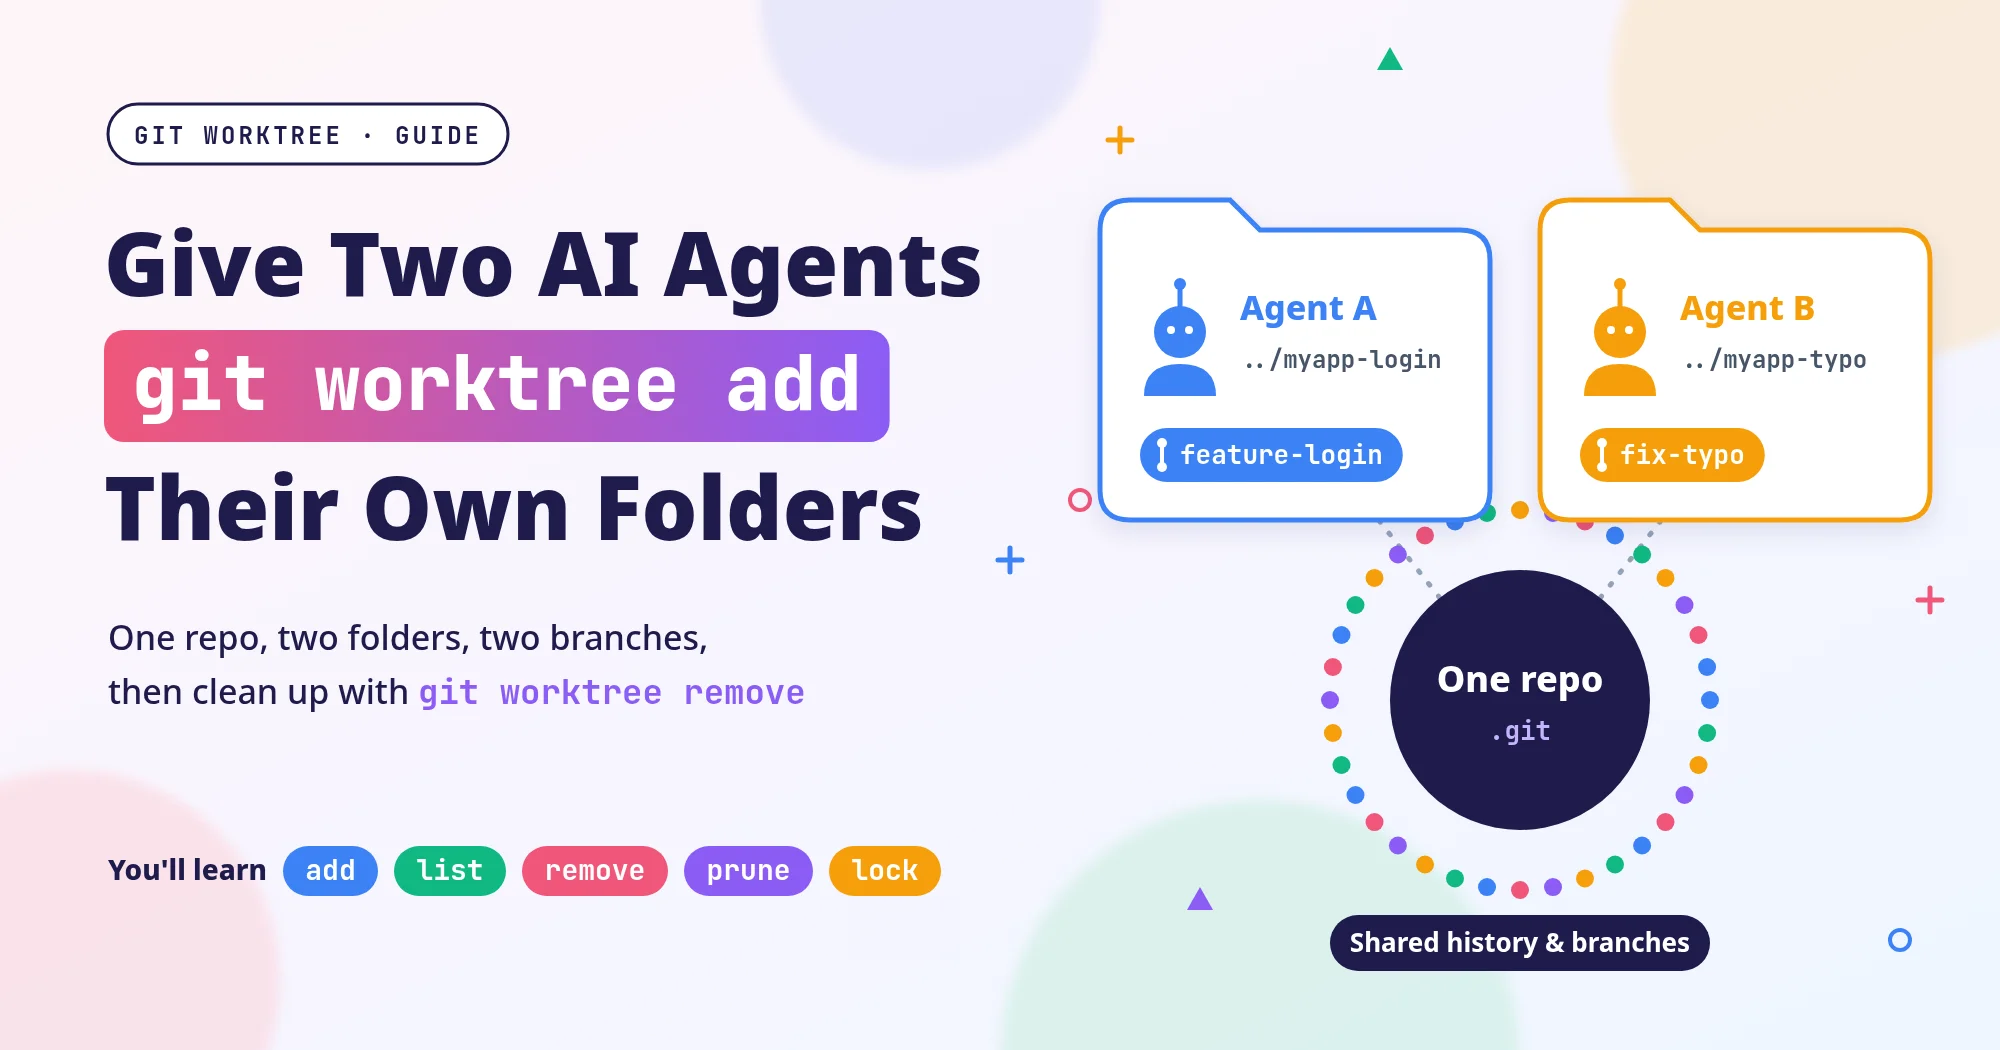
If I let two coding agents (AI assistants that can read files, edit them, and run commands) work on different tasks in the same folder, it is like two people sharing one desk and one computer. When one agent switches to another branch (a separate line of work), the files in the folder are replaced with that branch’s version, and the files the other agent is halfway through change as well. A better approach is to let the same repo (the place that holds the project files and the full history of changes) grow a second or third working directory, each checked out on its own branch. That is what git worktree is for.
This post is only about isolating those working directories, merging the work back, and cleaning up afterward. It does not compare AI tools. If you are thinking about what it means, in a process sense, to let several AI agents work in parallel, see AI Writes Code Faster. Why Is Shipping Still Slow? How I Think About an AI-Native SDLC.
Version note: This post follows the git-scm.com git-worktree manual (the Git 2.56.0 edition), read on 2026-11-11. Multiple checkout with git worktree is still marked experimental, and later behavior may change; treat the manual as the source of truth.
What a Worktree Is
The first sentence the Git manual uses to introduce worktrees says that one repository can have several working trees, so you can check out more than one branch at a time. To check out means to place the files of a branch or a commit (one saved snapshot in the history) into a folder so you can edit them.
A working directory (also called a working tree) is the folder whose files you actually open and edit. Git calls that folder, together with its own HEAD (the pointer that says which branch or commit this folder is on) and related metadata, a worktree. The first one, created by git clone or git init, is the main worktree. Any extra one you add with git worktree add is a linked worktree. The manual’s description defines it this way: a repository has one main worktree and zero or more linked worktrees. The manual excludes bare repositories from that rule; this post does not use them.
These worktrees share almost everything. Only a few pieces of data belong to each worktree on its own, such as HEAD and the index (the staging area, where changes sit after git add and before you commit). In short:
- Shared: the commit history, branches, tags, the stash (a way to set unfinished changes aside), and, by default, the repository configuration.
- Separate: the files in each folder, which branch that folder is on (HEAD), and each folder’s own index.
“Shared branches” means every worktree sees the same set of branches, while each folder decides for itself which one it is on right now. So a new commit made in one worktree is immediately visible in the others, but the files on each desk do not automatically become the same copy.
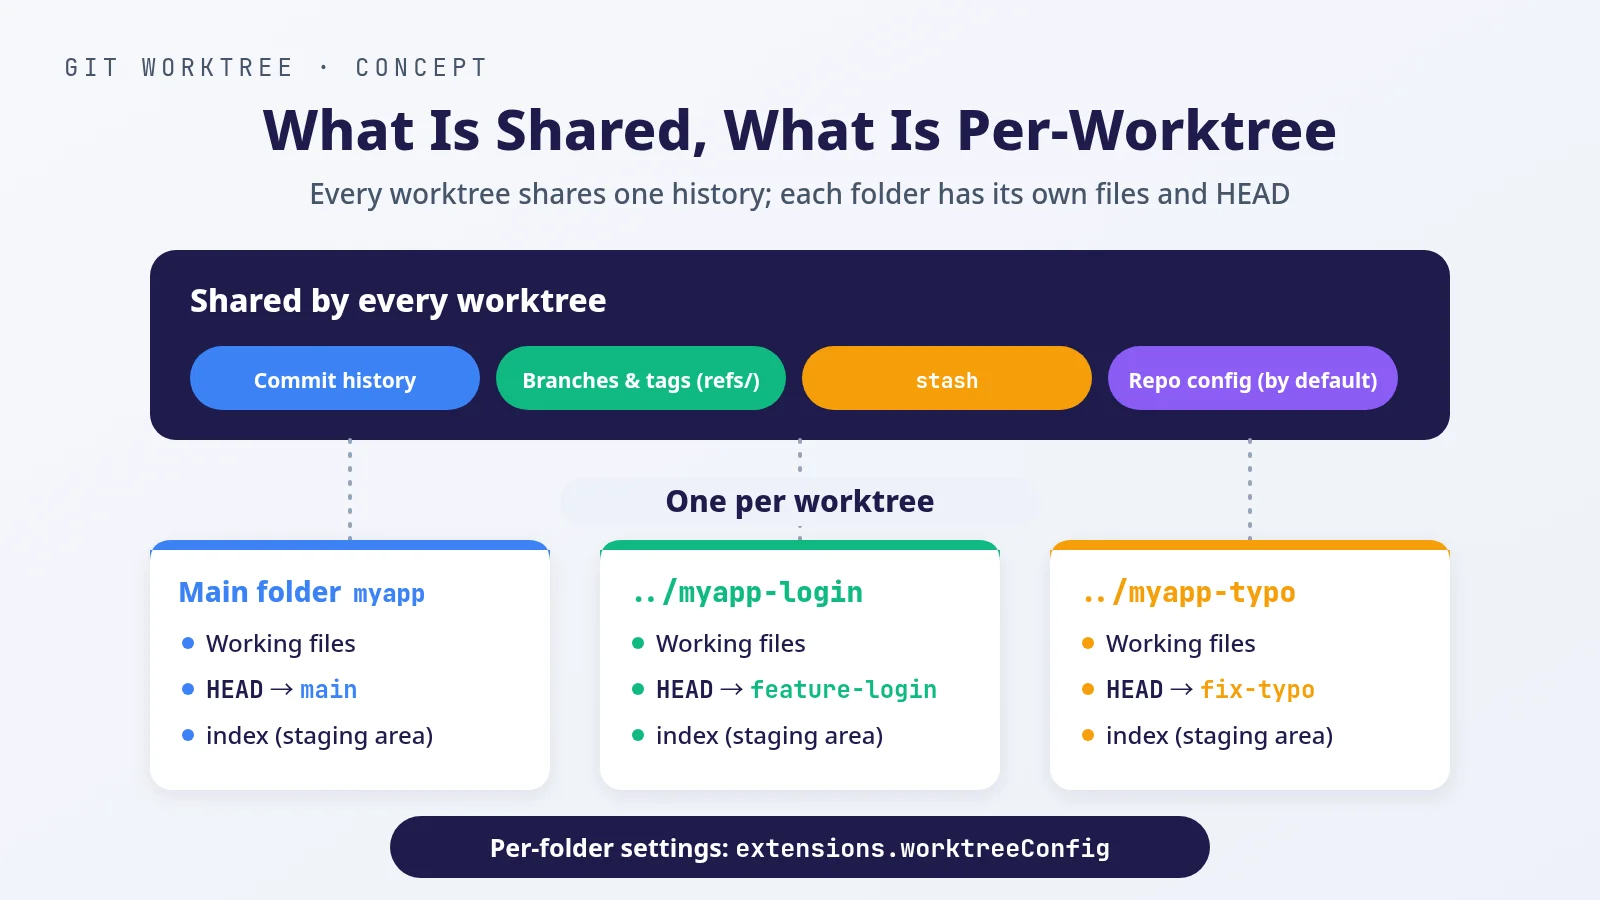 A concept illustration, not the real UI. At the top is what every worktree shares: history, branches, stashes, and config. Below, each worktree has its own files, HEAD, and staging area (index).
One implementation detail matters in practice: the .git at the top of a linked worktree is a small file, not a full directory. It points back at the administrative files that the main repository keeps for this worktree. In other words, a linked worktree folder is not a complete repository on its own. Do not copy it elsewhere as if it were a standalone repo, and do not delete the .git file.
Advanced: If you want one worktree to have its own settings, such as a different
user.email, rungit config extensions.worktreeConfig true, then write values withgit config --worktree. The manual notes that older Git versions will refuse to open a repository with this extension enabled. Shared configuration is enough in most cases.
When to Use It, and When Not To
Worktrees are a good fit in three situations:
- You want two AI agents (or you and one agent) to work on separate tasks without editing the same files.
- You are halfway through a change, you do not want to stash that work, and you still need to fix something urgent. That is the official example in the manual.
- You want a throwaway, clean folder for tests or experiments. In that case, use the
-doption described later.
You do not need a worktree when you are doing only one thing, or when the change is small enough that switching branches is enough. Those are practical suggestions, not hard rules from the manual.
One case is clearly a poor fit. A submodule is another repository nested as a subdirectory; the outer repository that holds it is what the manual calls a superproject.
Do not use this method for parallel work in a repository that has submodules. The BUGS section of the official manual says:
Multiple checkout in general is still experimental, and the support for submodules is incomplete. It is NOT recommended to make multiple checkouts of a superproject.
If you are not sure whether your repository uses submodules, here is how to check. A repository with submodules has a settings file called .gitmodules at its top level, and the manual explains that it holds one section per submodule. The file name starts with a dot, so your file manager may hide it by default. A command gives a more reliable answer:
1
git submodule status
This command prints one line for each submodule, with the commit it is on and its path. If it prints nothing, the repository has no submodules, and you can follow the steps below.
Step 1: Add a New Working Directory
Run the commands below in a terminal, from inside the original repository folder. I use a folder called myapp as the example; the new worktree is linked to the repository you run the command from.
I suggest putting the new worktree beside the repository folder, for example ../myapp-login. ../ means the parent folder, so myapp-login sits next to myapp. Do not put it inside the repository, where it can get mixed up with ordinary project files. This is my suggestion; the manual does not require any particular path.
The most common form creates a new branch and a new folder at the same time. After -b comes the name of the new branch, then the path of the new folder:
1
2
git worktree add -b feature-login ../myapp-login
git worktree add -b fix-typo ../myapp-typo main
These are two separate examples. The first line gives no starting point, so the new branch starts at the current HEAD, which is the commit you are on in myapp. The second line ends with main, so the new branch starts from main.
-b refuses to create a branch whose name already exists. The other option, -B, overrides that safeguard and resets the branch to the starting point you give it, which moves the branch away from wherever it pointed before. Use that option with care.
If you pass only a path, Git automatically names the new branch after the last path component. For example, git worktree add ../hotfix creates a branch called hotfix.
If you want to use a branch that already exists, such as a feature-search branch you created earlier, and it is not already checked out in another worktree, you can attach it like this:
1
git worktree add ../myapp-search feature-search
If you only want to try something and do not want a new branch, use -d. The new folder then has a detached HEAD: it is not on any branch, and it sits directly on the same commit as your current branch.
1
git worktree add -d ../myapp-try
Once it is created, go into the new folder to work:
1
cd ../myapp-login
Open any coding agent there and commit as usual. Note that the new folder contains only files that Git tracks (files you have already handed over to Git). Untracked things such as node_modules (installed dependencies) or .env (a settings file often used for passwords or keys) do not come along. Install them again, or copy them over yourself.
The commands in this section show the different forms; you do not need to type all of them. The worked example later in this post goes through the whole flow from start to finish.
What you get: a separate folder, on its own branch, that does not interfere with the original working directory.
One Branch Can Live in Only One Place
The manual states that if a branch is already checked out in another worktree, add will refuse to use it, unless you pass --force. That safeguard stops two folders from editing the same branch at once. I do not recommend bypassing it with --force.
Switching branches has the same safeguard. git switch and git checkout refuse to switch to a branch that another worktree already holds. So the main folder cannot switch to the branch an agent is working on. To see what that branch changed, you do not need to switch to it; Step 3 shows how to compare with git diff.
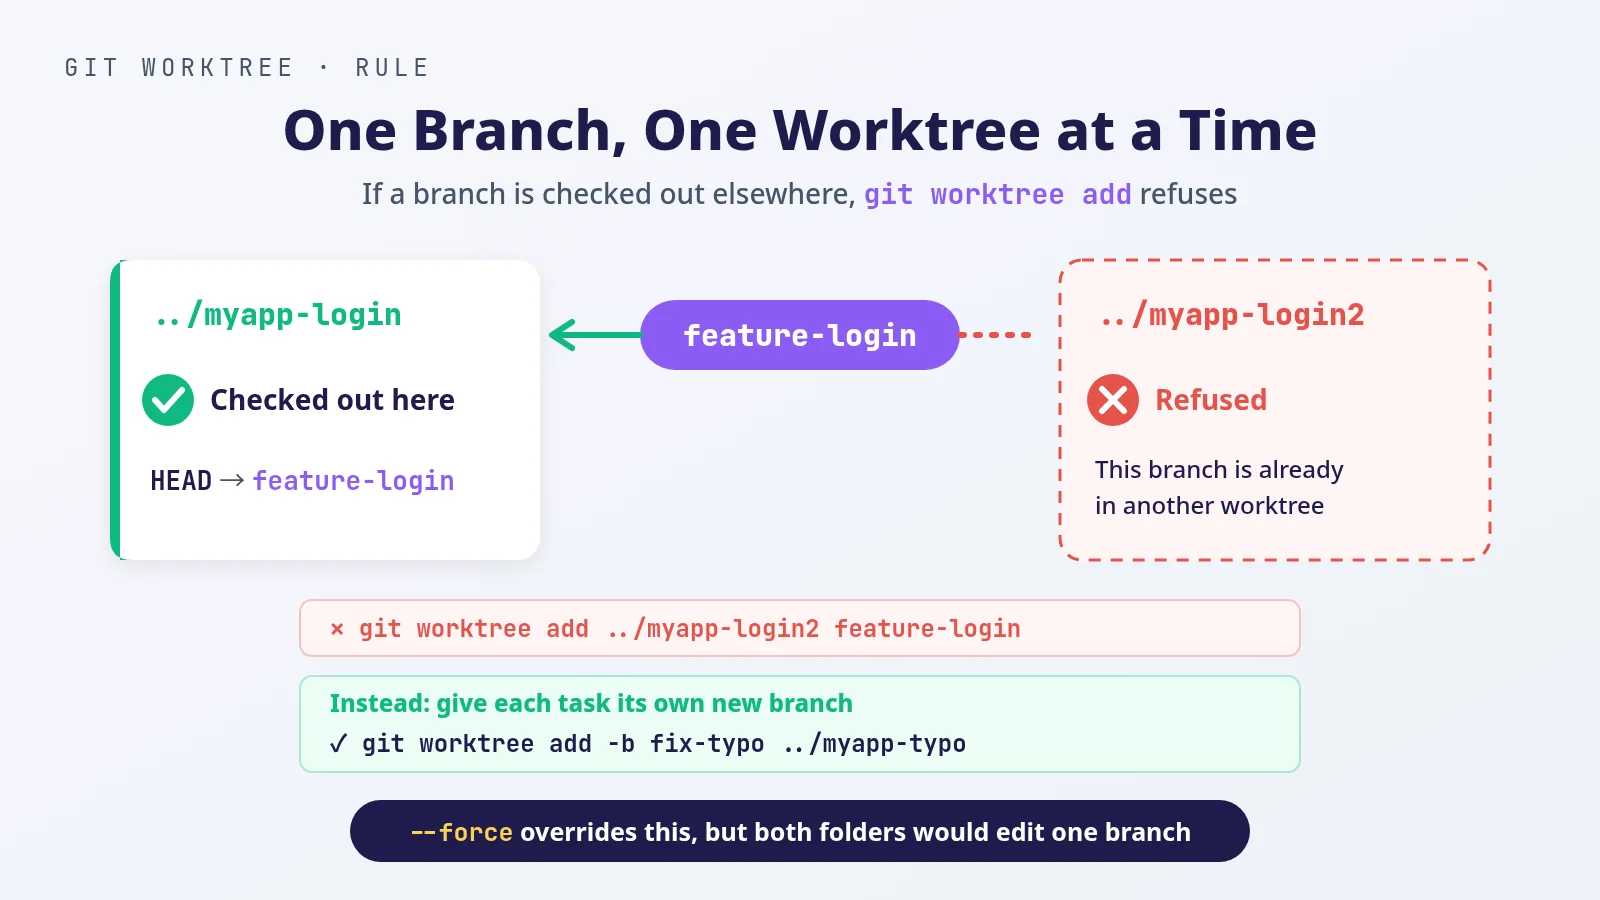 A concept illustration, not the real UI. The worktree on the left already holds the branch, so the one on the right is blocked from using it.
Step 2: List the Worktrees You Have
To see how many working directories are open, run:
1
git worktree list
According to the manual, the main worktree is listed first, followed by each linked worktree. Each line includes the path, the current commit, and the branch (or detached HEAD if there is no branch). A locked worktree is marked locked; one that can be cleaned up is marked prunable.
To see why a worktree is locked or prunable, add -v. The reason appears on the following line:
1
git worktree list -v
If you need to parse the list in a script (everyday use does not need this), use git worktree list --porcelain. The manual says this format stays stable across Git versions, and it recommends combining it with -z, so the output can still be split correctly even when a path contains a newline.
What you get: a list of every working directory, and where each one is checked out.
Step 3: Merge the Work Back Into main
Once the work in a worktree is done and everything you want to keep is committed, the next step is to bring that branch’s work back into main. There are two ways to do it; pick one.
Option 1: merge it yourself on your computer. Go back to the main folder myapp (for example, run cd ../myapp from myapp-login) and run:
1
2
3
git switch main
git diff main...feature-login
git merge feature-login
git switch mainputs the main folder onmain.git diff main...feature-loginlists whatfeature-loginchanged since it split off frommain. As the manual explains, the three-dot form compares from the point where the two branches share a common ancestor. Read it first, and merge once it looks right.git merge feature-loginbrings the commits from that branch into the branch you are on, which ismain.
You do not need to switch to feature-login to merge it, so it is fine that the branch is still checked out in its worktree. If both sides changed the same part of the same file, Git cannot pick one side on its own and stops to ask you to resolve it. This is called a conflict. For one way to handle conflicts, see mattpocock/skills, Part 5: Structure, Code Review, and Merge Conflicts.
Option 2: push it and open a PR. If you want someone else, or an automated review, to look first, push the branch to the remote repository (the copy hosted on a site such as GitHub) and open a PR there (a pull request, asking to merge the branch into the main line):
1
git push -u origin feature-login
origin is the name Git gives the remote repository by default when you run git clone. -u makes your local branch remember its matching remote branch, called its upstream, so a later git pull with no arguments knows where to update from.
After the PR is merged on the site, the main on your computer does not update by itself. Go back to myapp and run:
1
2
git switch main
git pull
git pull fetches the new changes from the remote and then merges them into the branch you are on.
What you get: main now contains that branch’s work, and you can clean up the worktree.
Step 4: Clean Up With remove and prune
When the work is done, go back to the main folder myapp and remove the linked worktree. The path can be relative or absolute:
1
git worktree remove ../myapp-login
The manual requires that only a clean worktree can be removed: there must be no untracked files, and no modifications in tracked files. If something is still outstanding, the command refuses. In that case, go back into that folder and commit what you want to keep. Add --force only when you are sure you do not need anything left there, because uncommitted changes go away with the folder. The main worktree cannot be removed.
remove deletes the folder and the worktree record. The branch remains, so delete it separately. The order is: remove the worktree that uses the branch first, then delete the branch:
1
git branch -d feature-login
-d only deletes a branch that has been merged. The manual’s condition is that the branch must be fully merged into its upstream branch (for example, the remote branch you set with push -u), or into the branch you are on if no upstream was set. If that is not the case, Git refuses, which tells you the branch still has commits that were not merged. Check whether the work still needs to be merged into main or pushed. Only when you are sure you do not need those commits, use:
1
git branch -D feature-login
-D is short for --delete --force and deletes the branch whether or not it was merged.
If you accidentally delete the folder with rm -rf or by putting it in the trash, git worktree list may mark that entry prunable. Preview what will be cleaned, then prune:
1
2
git worktree prune -n -v
git worktree prune
The prune description says this removes administrative data left behind by missing working trees. The manual also asks you to use git worktree remove next time. prune does not delete branches either.
If you do nothing, a later git gc will run git worktree prune --expire 3.months.ago, which only cleans up records of missing working trees that are older than three months. You can change that grace period with gc.worktreePruneExpire: now removes the grace period and cleans up immediately, and never turns automatic cleanup off.
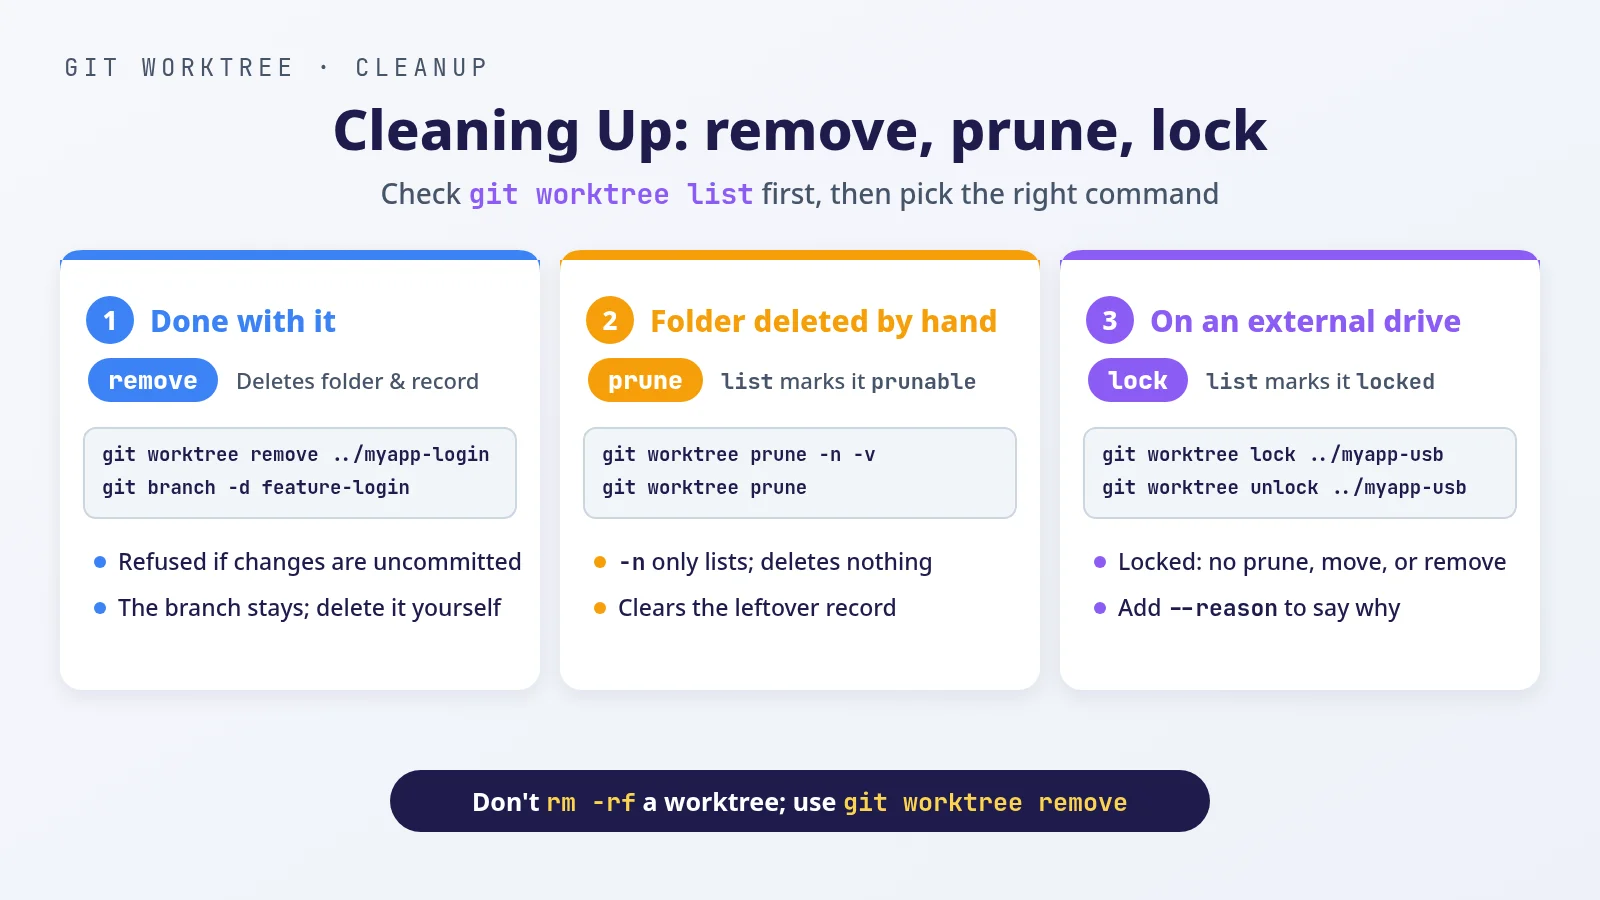 A concept illustration, not the real UI. Finished worktrees can be removed; leftover records from a manual delete are pruned; a locked worktree is left alone.
A Worked Example: A Login Page and a Typo Fix
Suppose I have a website repository in a folder called myapp. I want one AI agent to build a login page, and another to fix a typo in the README, without either one touching the other’s files.
- In
myapp, update the main branch first:git switch main, thengit pull. From
main, create one new branch and one new folder for each task:1 2
git worktree add -b feature-login ../myapp-login main git worktree add -b fix-typo ../myapp-typo main
What this step gives you: two new folders, checked out on
feature-loginandfix-typo.- Open two terminals, enter
../myapp-loginand../myapp-typo, and start one coding agent in each. Commit in each folder as usual. The files do not affect each other. Aftergit worktree list, you should see three folders: the originalmyappon the first line, plus these two new ones. Review: before pushing, you can check what the branch changed from the main folder
myappwithgit diff main...feature-login. To have someone else review it, push each branch and open a PR (a pull request, asking to merge the branch into the main line):1
git push -u origin feature-loginDo the same for the other branch. You can then automate the review; see Automating PR Review With GitHub Actions and an AI Agent: This Site as an Example. For a fixed approach to structure checks, review, and merge conflicts, see mattpocock/skills, Part 5: Structure, Code Review, and Merge Conflicts.
- Merge: if you opened PRs, wait for them to be merged on the site, then run
git pullinmyappto updatemain. If you skipped the PRs, rungit merge feature-loginandgit merge fix-typoin the main foldermyapp(which has been onmainsince step 1). Step 3 has the details. Clean up: first make sure the agents in both folders have stopped and everything you want to keep is committed, because
removeonly accepts a clean folder. Then go back tomyapp, remove the worktrees first, and delete the branches after:1 2 3 4
git worktree remove ../myapp-login git branch -d feature-login git worktree remove ../myapp-typo git branch -d fix-typo
If
git branch -drefuses, see the explanation in Step 4. After a finalgit worktree list, only the main folder should remain.
A small note: if the project rules live in an AGENTS.md that Git tracks, every worktree will have the same copy. See How to Write AGENTS.md: Give Coding Agents Your Project Rules. If you also want automatic checks at fixed moments in a working directory, see Automate Repeated Checks: Format, Test, and Flag Sensitive Files With Claude Code Hooks.
Protect a Worktree With lock and unlock
If a worktree lives on a portable drive or a network share that is not always connected, lock it so its administrative files are not pruned automatically. A locked worktree also cannot be moved or removed.
To lock a worktree that already exists:
1
git worktree lock --reason "on an external drive" ../myapp-usb
You can also lock it at creation time, so there is no moment when it exists but is not yet locked:
1
git worktree add --lock --reason "on an external drive" -b feature-usb ../myapp-usb
git worktree list -v shows the lock reason. When you are done, unlock it:
1
git worktree unlock ../myapp-usb
The manual allows --force twice to operate on a locked worktree, but the safer step is to unlock first, rather than forcing a deletion from the start.
How to Move or Repair a Worktree
To put a worktree somewhere else, let Git move it with move. For example, to move ../myapp-typo (assuming you have not removed it yet) under ../tasks/:
1
git worktree move ../myapp-typo ../tasks/myapp-typo
The manual notes that you cannot use this command on the main worktree, or on a linked worktree that contains submodules.
If you already moved it yourself in the file manager or with mv, the location Git has on record no longer matches. Run git worktree repair inside the worktree at its new location to reconnect it. If you moved several, you can run it from any one worktree and list every new path after it:
1
git worktree repair ../tasks/myapp-typo ../tasks/myapp-login
If it was the main folder that moved, run git worktree repair in the main folder, so the linked worktrees can point back to it.
Which Command to Use in Each Situation
| I want to… | Use this |
|---|---|
| Start a new task on a new branch | git worktree add -b <branch> <path> [start-point] |
| Check out an existing branch in a new folder | git worktree add <path> <branch> |
| Try something without creating a branch | git worktree add -d <path> |
| See what is open | git worktree list (-v for details, --porcelain -z for scripts) |
| Merge the work back into main | In the main folder, git switch main, then git merge <branch>; or git push -u origin <branch> and open a PR |
| Clean up when finished | git worktree remove <path>, then git branch -d <branch> |
-d refuses to delete a branch | Check that the work was merged; only if you do not need it, git branch -D <branch> |
| Recover after a manual folder delete | git worktree prune (dry-run with -n -v first) |
| Keep a worktree on an external drive from being pruned | git worktree lock --reason "…" <path> / unlock |
| Change its location | git worktree move; if you already moved it, git worktree repair |
| Give each folder different settings | extensions.worktreeConfig plus git config --worktree |
| Check whether a repo has submodules | Look for .gitmodules at the top level, or run git submodule status |
| Work in a repo that has submodules | Do not use worktrees for parallel development |
| Do only one thing | You do not need a worktree; switch branches |
Common Mistakes
- Trying to use the same branch in two worktrees, then hitting a refusal. Create one branch for each.
- Using
-bwith a name that already belongs to an existing branch, then hitting a refusal. Pick a new name; if you meant to pick up that branch, usegit worktree add <path> <branch>instead. git worktree removerefuses. Usually the folder still has uncommitted changes or untracked files. Commit what you want to keep, and add--forceonly when you are sure you do not need the rest.- Deleting the folder with
rm -rfinstead ofgit worktree remove. Clean the leftover record withgit worktree prune. - Trying to switch the main folder to a branch an agent is using, then hitting a refusal. You do not need to switch; use
git diff main...<branch>to see the changes, or rungit merge <branch>directly. - Forgetting to delete the branch after
remove, so it stays in the repository. git branch -drefuses. The branch still has commits that were not merged. Make sure the work was merged or pushed, and use-Donly when you are sure you do not need it.- Expecting
node_modulesor.envto appear automatically in the new folder. Copy or reinstall untracked files yourself. - Creating the worktree inside the repository folder, where it can get mixed up with project files.
- Moving the folder in a file manager, after which Git cannot find it. Run
git worktree repairat the new path. - Pushing ahead in a repository that has submodules. See the limitation above.
- Adding
--forceas soon as a command refuses. That can discard uncommitted work, or bypass the rule that a branch may be checked out in only one place.
What to Do Next
The next time two AI agents need to work at once, start with git worktree add -b so each gets its own folder. When the work is done, merge it back into main (or push it and open a PR), then run git worktree remove, and delete the branches you no longer need. If the repository has submodules (look for .gitmodules at the top level), skip this approach.
From there, you can write project rules for the agent in each working directory; see How to Write AGENTS.md: Give Coding Agents Your Project Rules. To automate review, see Automating PR Review With GitHub Actions and an AI Agent: This Site as an Example. For command details, use the git-worktree manual. The grace period for automatic cleanup is documented under gc.worktreePruneExpire in git-config.